Gum printing is a commitment. Preparing the paper for printing can take two or three days. Printing a simple four color (CYMK) color run is another four days. The Flute Player is slated to have at least a dozen color print layers. You see where this is going. It's like an artist's painting, done over many days, sometimes weeks. That, is why I only do one, make them unique. The reason isn't simply because attempting to duplicating a gum print is a fool's errand, unless doing a four color separation gum with tightly measured pigment to gum ratio. None of that method appeals to me one bit. That doesn't mean someone else might like such an approach, but you would learn little from me.
The principle of gum printing is fairly straight forward. Suspending a pigment in a clear gum mixture, then mixing an equal amount of a potassium dichromate in 13% solution, brush it on a treated paper then contact print onto the sensitized paper with a negative the size of the desired image. That has been said in hundreds of variations, in excellent publications of photographic how-to books. Following any one of those would lead to learning gum printing. What is different is the individual approach to the process, as this process is the most malleable, the most artistically expressiven with the most leeway for personalized influence of any of the historical process.
It might be said that the gum process is a photographic watercolor. My wife being a watercolor artist has demonstrated that many times. She even attempted to 'teach me how to paint', soon realizing what I told her about my being seriously lame drawing anything was an understatement. Gum printing employs subtractive color theory. Stacking primary colors using translucent watercolor pigments realized something akin to a color image. As you can imagine, the exact shade of primary color, the amount used on that layer, influences the next layer and the one after that. Each tonal range being affected slightly differently for any color layer applied, with the most influence at the higher tonal values, for obvious reasons. The tonal ranges from Zone III down to Zone I are affected, but not as much as higher tonal ranges.
It is for this reason that a full separated tonal range on the negative is important. The more separated the better, to a point. There is a diminishing return at some point. A nice bright negative is the best printing negative. A negative that would print well in an enlarger with a cold light head would work. The reason that a bright negative is beneficial is that there is increased tonal separation. Ideally, a print time of ten minutes would be ideal. Basing the tonal range on eight tonal ranges, using a ten minute print time, or a bit less, is that each minute roughly corresponds to a tonal range, and that is one of the secrets of successful control over the printing process. Too much print time and the gum becomes insoluble, and nothing can change that. Like a watercolor, the higher tonal values must be left untoned with color if a near white is desired. Once that tonal range has been affected by color that won't float off, it isn't leaving. The art of it is printing just up to the tonal value that you want some pigment to float off, but not all. That would be the "float point'. I made that up. That's my term for just exactly enough light to allow the floating time for the paper to be around 1-2 minutes in room temperature water.
The above is not meant to be specific instructions on how to print in gum. That comes later, with specific mixture amounts and rations that I use, as there are numerous approaches to printing in gum. I am covering the concept and practice of gum printing here. I will also soon be doing print time testing for gums, but first the silver needs to be finished. Tuesday will be printing new negatives, trying out green images as well as predictable density range settings. Wednesday is print day again. I will know so much more. Before gum testing can begin there will be a few days of paper preparation.
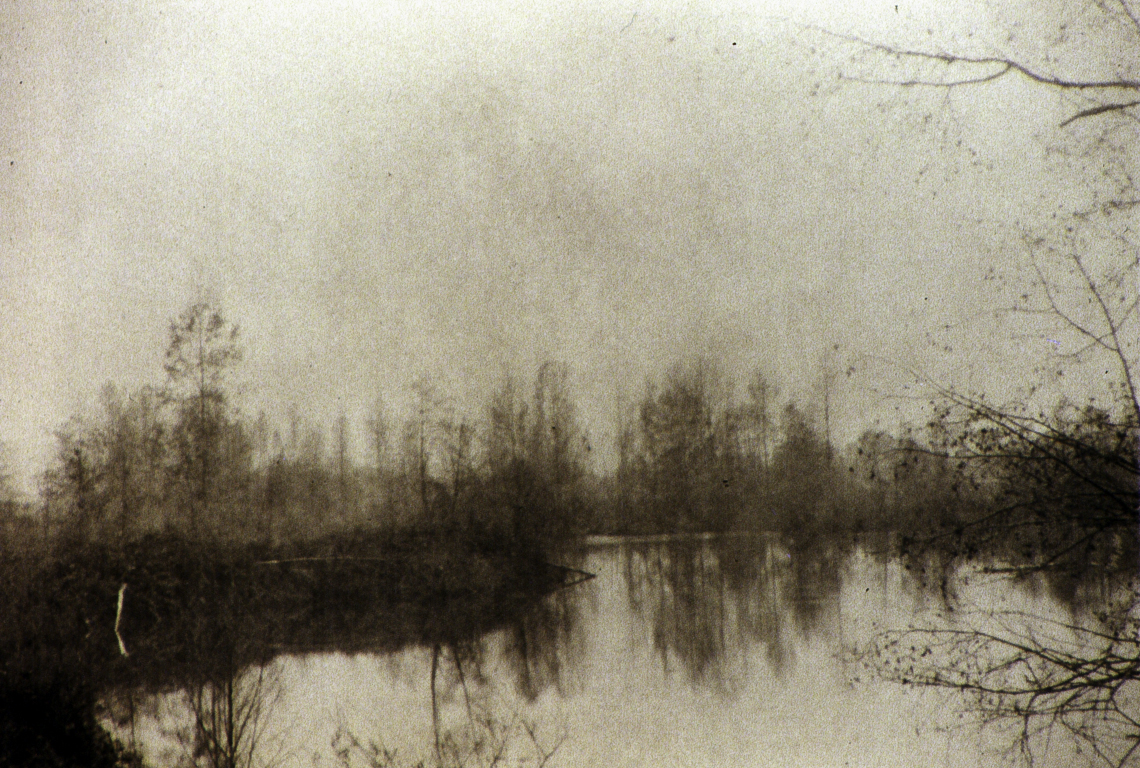
For now I can only show gums printed thirty years ago, when I first began. The early prints were predictably flat with little texture or detail. To learn that, took five years of study and practice. Eventually things began to fall into place. Perhaps in a week or so there will be new gums to show how digital negatives have made this process something available to anyone who will take the tome to learn the basic procedure and apply themselves. The cost is seriously low, and the supplies can be found in local stores.
Gum Dichromate Print (from paper negative)~ "Just Before The Rain"
1985 ~ 5"x7" ~ Unique
Eugene, Oregon
No comments:
Post a Comment