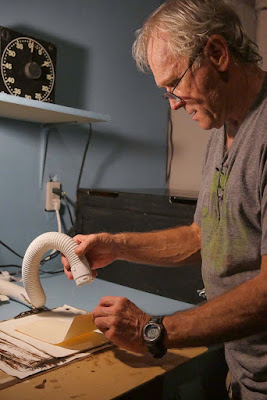
For those of you photographers who get really excited about your work or a special print, I am ecstatically excited to say the new Solar Printer is finally printing now. The fluorescent tubes and reflective Mylar both arrived within five minutes of each other. PJ and I laid the Mylar on the bulb mounting board with spray adhesive, then fitted the bulbs between their respective tombstones, then plugged it in. We're running it through an enlarger timer, seen on the wall in one of the photos posted. It even has a buzzer when the time is up. Class act, that.
There will need to be numerous tests to determine an optimal print time. Both of us will be printing in silver for awhile, then toning in palladium, or, printing in gum, and that is a more delicate printing task concerning light intensity. One needs to know print time for each and ever tonal range of the print's image. That is important. Without that knowledge float times would be pure guesswork. What I am after, at least for now, is a print time for silver, and hopefully for gum as well, of ten minutes, give or take. The negatives for silver would be scaled differently than for gum, but both could both share a ten minute print time; total. For gum, that would mean at ten minutes there would only be a possibility of floating off unused gum on zone VIII, at best, perhaps everything in the image would be insoluble at that point. I will be focusing exclusively on exactly how that is controlled when I start printing the gums again using the printer, and have some predictable control over the printing.
The snaps were taken by PJ while I was prepping a test strip for a simple print run to get a basic indication of just how much UV power the printer was putting out. It is the muscle machine I had thought it to be. I coated the test strip print paper with a 10% silver solution, with the pre-treated paper salted at [1 1/2%] salt. I use untreated sea salt. I did a simple dMax test for rough time, by inspection, comparing that test strip with a print I printed weeks ago, using the sun. That print took somewhere around 14 minutes, some take up to nearly 20 minutes to fully print in, pointed towards north sky. That would shorten considerably pointed into the sun. The dMax print time I gave that test strip was seven minutes. At four minutes, when I first checked it, it was very near dMax. We will be raising the printer probably four inches for further testing. That would be half the distance that the bulbs are to the print now, which is just shy of eight inches. With the light falloff by distance formula, that four inches, which is a 50% increase in distance, should reduce the UV intensity by roughly half, I think. That would be a 12" distance to the table top from the bulbs. There is seven inches available for adjustment height, using the slotted panels on either side of the printer.
This is what the printer looks like. PJ snapped several images of the printer, and of me, and usually I stay on the back side of a lens, only. But this does show off a corner of the darkroom area that is now dedicated to hand coated printing, only.
Printer in its corner ~ This is the prototype. After this, no adjustment panels will be needed.
The light strip across the front is the illuminated diffuser sheet that can be pulled out (thumb/finger spot in middle) or inserted at any time.
The chrome knob below is the handle to open the printer door at the bottom, which is hinged.
The panel on the left with bolts and wing nuts are the adjuster panels; slot allows 7" lift for the printer.
Printer Front ~
Printer with printer door open ~
Actual & usable inside printing area is 20"x24"
6"x9" split back printing frame inside with test strip ~
The inside of the printer will receive a coat of flat black paint before it's done.
dMax comparison of test strip to salted silver print ~
The print on the left was a 14 minute print ~ Test strip on right was 7 min, with better dMax....
That would be me drying the test strip after brushing on the silver ~
The timer on shelf is most excellent for this work.
The hose for the hair dryer connects to the woman's hair drying (the old cover cap style I found online for $24.
The printer is to my right.
Hopefully I look like I'm having fun.


No comments:
Post a Comment